That persistent damp spot on your basement wall is more than just an eyesore; it’s a symptom of a much larger issue. Simply painting over it or patching a visible crack rarely solves the problem for good. The real culprits are often invisible forces like hydrostatic pressure and poor soil drainage working against your home’s foundation. To achieve a permanently dry basement, you have to address the root cause, not just the symptom. This article explains the science behind why basements leak and details the professional methods used for waterproofing basement walls that provide a lasting defense, ensuring water is managed correctly and your foundation remains secure.
Key Takeaways
- Address the Source, Not Just the Symptom: A wet basement is almost always caused by issues outside your home, like poor drainage or immense soil pressure. A true fix involves managing that external water, not just sealing an internal crack.
- Choose Your Strategy: Block or Redirect: Exterior waterproofing stops water from ever touching your foundation, offering the most complete protection. Interior systems expertly collect and channel away any water that gets inside, ensuring your living space stays dry.
- Protect Your Investment with Simple Habits: After the professionals leave, your job is to maintain the fix. Simple tasks like keeping gutters clean and ensuring downspouts direct water far from the house are your best defense against future problems.
Why Is My Basement Leaking?
Finding water in your basement is a frustrating experience that no homeowner wants to face. That damp, musty smell or the sight of a puddle can be alarming, but it’s a common problem. The first step to fixing it is understanding where the water is coming from and why it’s getting in. Most of the time, water enters the basement because of issues with the soil and pressure around your home’s foundation. Water will always follow the path of least resistance, and even the smallest crack or gap can become an open invitation for moisture. By identifying the root cause, you can find a lasting solution instead of just a temporary fix.
Spotting the Telltale Signs of Water Damage
The most obvious sign of a leak is water pooling on the concrete floor, but moisture problems often show up in more subtle ways. You might notice a persistent damp or musty odor, which often points to mold or mildew growth hidden from view. Look for dark stains or discoloration on the walls and floor, or paint that is peeling, bubbling, or blistering. Another telltale sign is efflorescence—a white, chalky substance left behind as water evaporates, which indicates that moisture is seeping through your concrete walls. Catching these early warnings can help you address the problem before it leads to more significant damage requiring extensive waterproofing solutions.
Where Is the Water Coming From?
Water can find its way into your basement from several sources. Often, the problem starts outside with poor drainage. If your gutters are clogged or your downspouts release water too close to the house, the soil around your foundation can become oversaturated. Similarly, if the ground around your home doesn’t slope away from the foundation, water will naturally flow toward it. This excess moisture can then seep through pores in the concrete or exploit existing foundation cracks. A professional inspection can pinpoint whether the issue is surface-level drainage or a more serious structural problem that requires crack injection to seal entry points.
Understanding Hydrostatic Pressure
One of the biggest culprits behind basement leaks is hydrostatic pressure. Think of it as the weight of water in the soil pushing against your foundation walls. After heavy rain or snowmelt, the ground becomes saturated, and all that water has to go somewhere. If your property has poor drainage, the water builds up and exerts immense pressure on your basement walls and floor. This force is strong enough to push water through tiny, invisible cracks and joints in the concrete. Over time, constant hydrostatic pressure can weaken your foundation, creating bigger problems that demand professional foundation repair.
How Water Affects Your Health and Home’s Value
A leaky basement is more than just an inconvenience; it can have serious consequences for your home and your health. Persistent moisture creates the perfect environment for mold and mildew to thrive, which can trigger allergies and respiratory issues. Water getting in can also cause significant structural problems, from sticky doors and warped flooring to cracks in your concrete. Ignoring these issues can decrease your property’s value and lead to costly repairs down the line. Investing in proper waterproofing is a smart move that protects your family’s health, prevents structural damage, and preserves your home’s overall market value.
Waterproofing Your Basement from the Inside
When digging around your foundation isn’t practical, interior waterproofing is an incredibly effective way to keep your basement dry. This approach focuses on managing any water that seeps through your foundation walls, collecting it, and directing it safely away from your home. Instead of creating a barrier on the outside, you’re building a comprehensive water management system on the inside. A professional waterproofing strategy often combines several of the following methods to create a dry, usable space and protect your home’s structural integrity from the inside out. It’s a reliable solution that addresses moisture issues at their point of entry into your living space.
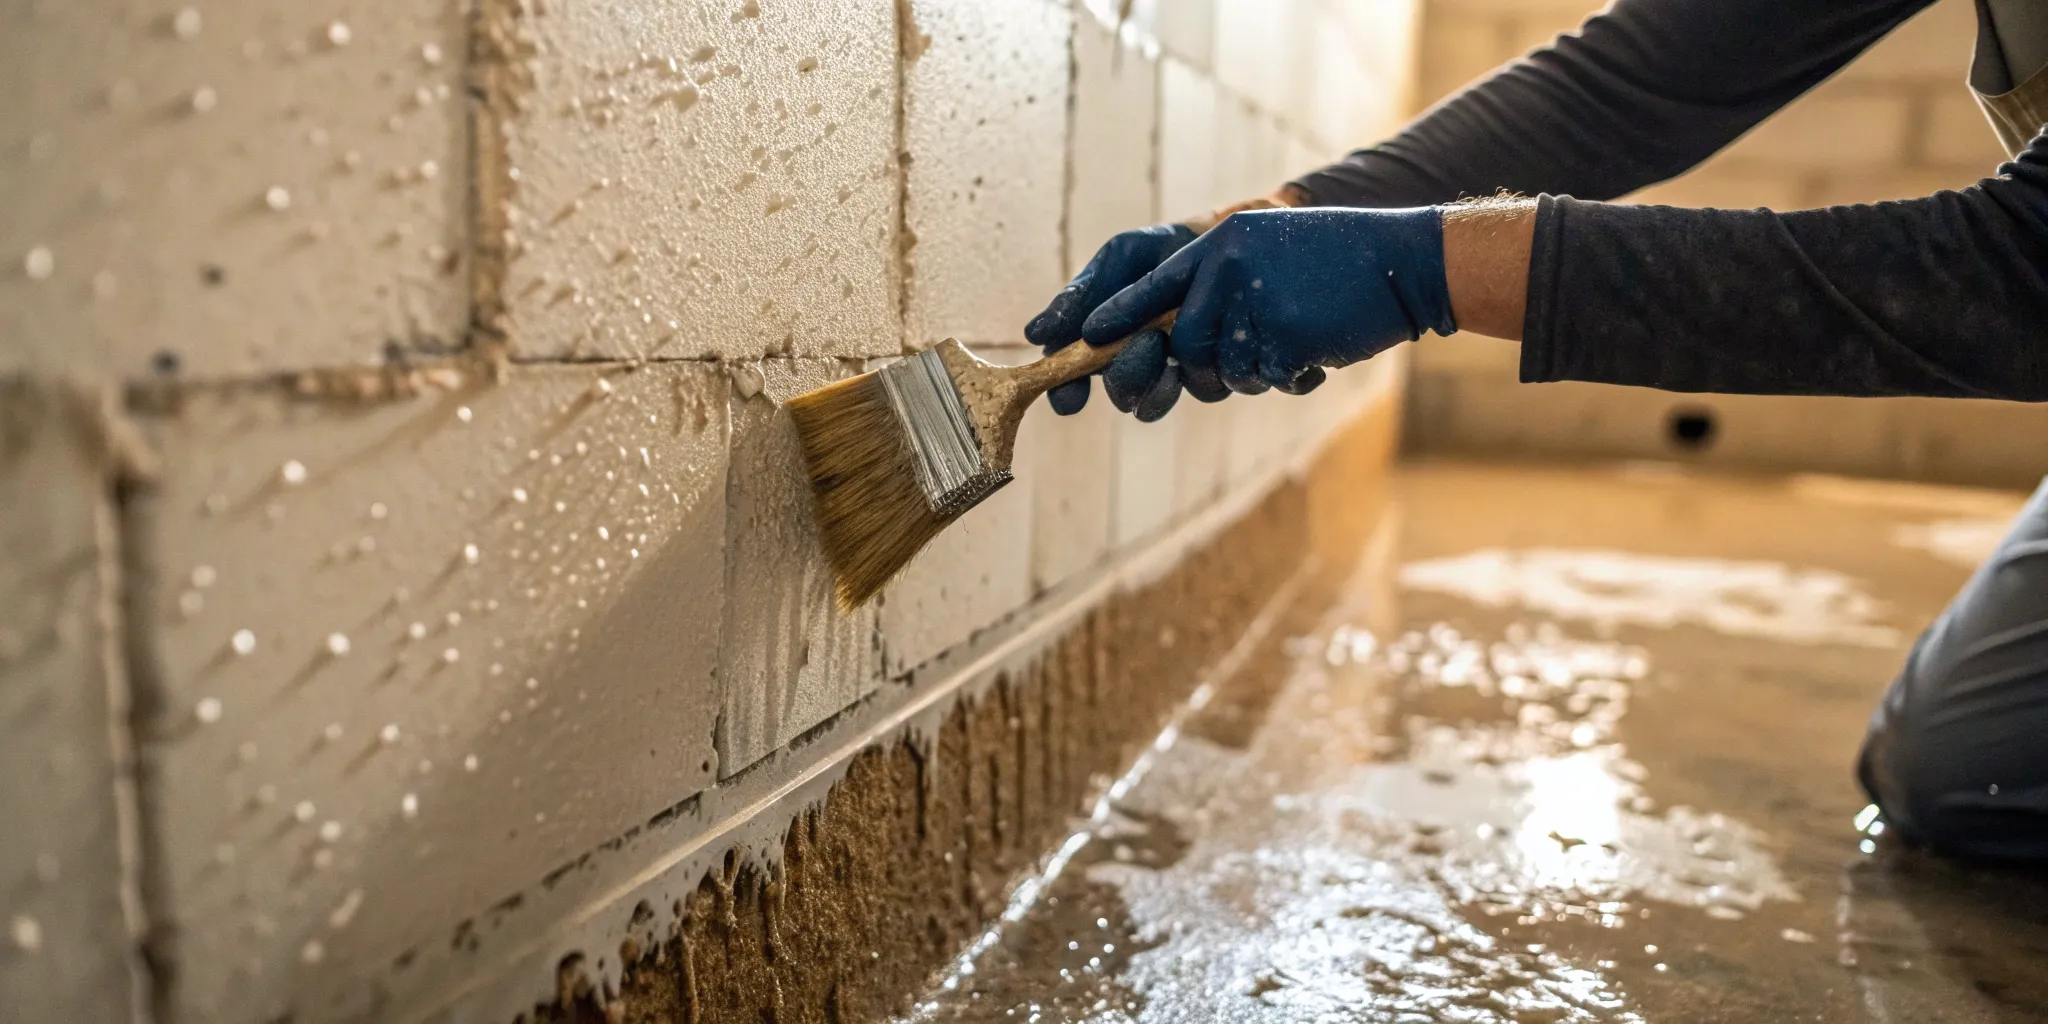
Applying Sealants and Coatings
Think of waterproof sealants as your first line of defense inside the basement. After the walls are thoroughly cleaned and dried, a high-quality waterproof coating can be applied directly to the concrete. These thick, cement-like sealants work by sinking into the pores of the concrete, creating a durable barrier that stops minor leaks and dampness in their tracks. Before any coating goes on, it’s essential to address any existing cracks or holes. A professional will often use an epoxy or polyurethane crack injection to ensure these weak spots are completely sealed. While sealants are great for handling low-level moisture, they are most effective when used as part of a larger waterproofing system for more significant water problems.
Installing an Interior Drainage System
For persistent water intrusion, an interior drainage system is the gold standard. This system works by capturing water right where it enters—typically at the joint where the basement walls meet the floor. A contractor will install a hidden drainage channel (sometimes called a French drain) just below the floor slab around the perimeter of your basement. Any water that seeps through the walls flows down into this channel instead of onto your floor. From there, the water is directed to a sump pump, which takes over to remove it from your home. This method doesn’t stop water from entering the foundation, but it expertly manages it, ensuring your basement stays completely dry.
Setting Up a Sump Pump
The sump pump is the heart of your interior drainage system. It’s a submersible pump that sits in a basin, or sump pit, installed at the lowest point in your basement. As the drainage channels collect water, they funnel it directly into this pit. Once the water reaches a certain level, a float switch activates the pump, which then pushes the water out of your home through a discharge pipe. This pipe directs the water a safe distance away from your foundation, preventing it from cycling back in. A reliable sump pump is your best protection against flooding during heavy storms, and many homeowners opt for a model with a battery backup for extra security during power outages.
Using Vapor Barriers and Insulation
Water doesn’t just show up as a liquid; it can also move through your concrete walls as vapor, leading to high humidity, musty smells, and mold. A vapor barrier is a waterproof sheet, usually made of heavy-duty plastic, that gets installed against the foundation walls. This barrier stops water vapor from entering your basement air, keeping the space drier and healthier. This process is similar to the encapsulation methods used in crawl-space repairs to control ground moisture. Pairing a vapor barrier with rigid foam insulation not only helps manage moisture but also improves your home’s energy efficiency, making your basement a more comfortable and finished space.
Waterproofing Your Basement from the Outside
Tackling moisture from the outside is often the most thorough way to keep your basement dry for good. This approach stops water before it can even touch your foundation walls, creating a powerful, long-lasting barrier. While it’s a more involved process than interior methods, exterior waterproofing addresses the root cause of water intrusion by managing groundwater and protecting your foundation directly. It’s a comprehensive solution that involves several key steps to ensure your home stays protected from the elements.
Excavating and Coating the Foundation
The first step in exterior waterproofing is carefully excavating the soil around your home to expose the foundation walls. Once the walls are accessible, they are thoroughly cleaned to remove any dirt and debris, creating a smooth surface for treatment. A professional team then applies a high-quality waterproof coating or membrane directly to the foundation. This impermeable layer acts as a shield, blocking moisture from seeping through the concrete. This process is a core component of a robust waterproofing strategy, ensuring a watertight seal that protects your home’s structural integrity from the outside in.
Adding an Exterior Drainage System
After the foundation is sealed, the next step is to manage the water in the surrounding soil. This is where an exterior drainage system, often called a French drain, comes in. This system is installed at the base of your foundation in the trench created during excavation. It consists of a perforated pipe surrounded by gravel, which collects groundwater and channels it safely away from your home. By redirecting water, the drainage system relieves hydrostatic pressure—the force of water pushing against your foundation. This is a critical part of any comprehensive foundation repair plan, as it prevents water from building up and causing damage.
Sealing Foundation Cracks
Before any waterproof coating can be applied, it’s essential to address existing flaws in the foundation. Over time, concrete can develop cracks or holes that create easy pathways for water to enter your basement. A professional will meticulously inspect the exposed foundation walls and fill any openings with durable materials like hydraulic cement or specialized epoxy. This crack injection process doesn’t just patch the problem; it creates a permanent, watertight seal. Sealing these vulnerabilities ensures the new waterproof membrane has a solid, intact surface to adhere to, preventing future leaks at their source.
Grading Your Landscape for Better Drainage
Effective waterproofing extends beyond the foundation itself—it includes the ground surrounding your home. The slope of your yard, or its “grade,” determines where rainwater and snowmelt go. If the ground slopes toward your house, water will pool against the foundation and eventually find its way inside. A professional can regrade the landscape to create a gentle slope away from your home, directing surface water to a safe distance. This simple but crucial step works hand-in-hand with below-grade systems and is fundamental to proper water management, especially for homes needing hillside stabilization to control soil and water flow.
How to Prepare for Your Waterproofing Project
Getting ready for a waterproofing project can feel like a big task, but a little preparation goes a long way toward a smooth and successful outcome. Taking these steps helps your professional team work more efficiently and ensures the final solution is as effective as possible. Think of it as setting the stage for a permanently dry basement. By clearing the area, understanding the diagnosis, and knowing what to expect, you become an active partner in protecting your home. It all starts with a clear assessment of the problem, followed by some hands-on prep work to get the space ready for its transformation.
Get a Professional Assessment
Before you do anything else, getting a professional assessment is the most important first step. A specialist can accurately diagnose why and where water is entering your basement, which is often more complex than just a visible crack. Professionals provide long-term protection because they address the root cause, whether it’s hydrostatic pressure, poor drainage, or foundation flaws. An expert will inspect your foundation, analyze moisture levels, and identify all entry points. This thorough evaluation ensures that the right waterproofing solution is chosen for your specific situation, saving you from spending money on fixes that don’t last.
Prep Your Basement Walls
Once you have a plan, preparing the space is key. Start by moving any boxes, furniture, or stored items away from the interior walls, giving the crew at least a few feet of clearance. If there’s any standing water, it needs to be removed and the area dried completely. This helps confirm the source of the leak and allows waterproofing materials to bond properly. You should also clean the walls by scraping off any peeling paint and scrubbing away dirt or white, powdery residue known as efflorescence. A clean, clear, and dry surface is the perfect canvas for a successful crack injection and waterproofing application.
Analyze Your Soil Conditions
What happens outside your home is just as important as what happens inside. The soil around your foundation plays a huge role in basement moisture. Poor drainage and certain soil types, like expansive clay, can hold water against your foundation walls, creating immense pressure. A professional will analyze the soil and the grading of your landscape to see if they are contributing to the problem. This analysis helps determine if an exterior solution, like an outdoor drainage system or hillside stabilization, is needed. Understanding your property’s unique conditions is critical for creating a comprehensive waterproofing strategy that lasts.
Choose the Right Materials
Not all waterproofing products are created equal, and using the wrong one is a common mistake. The materials must be compatible with your foundation and the specific type of water problem you have. For example, a simple paint-on sealant might be fine for minor dampness, but it won’t stand up to significant hydrostatic pressure. A professional will select the right high-performance materials, from flexible sealants and waterproof membranes to specialized polyurethane geotechnical foam for sealing cracks and voids. Relying on expert knowledge ensures you get a durable, long-lasting solution instead of a temporary patch.
What to Expect During the Waterproofing Process
Knowing what a professional waterproofing project involves can help you feel more confident as you move forward. While every home is different, a reputable contractor follows a clear, systematic process to diagnose the problem and apply a lasting solution. It’s not just about patching a crack; it’s about creating a comprehensive system that keeps water out for good. From the initial inspection to the final cleanup, each step is designed to address the root cause of the water intrusion.
The process typically starts with a deep dive into why your basement is leaking in the first place. From there, the team will prepare the area, apply the right materials, and install a drainage system to manage water around your foundation. A professional waterproofing project is thorough because a quick fix rarely works long-term. Understanding these steps will help you know what questions to ask and ensure you’re getting a high-quality job that protects your home for years to come.
A Thorough Foundation Inspection
The first thing a professional will do is a complete foundation inspection. This isn’t just a quick look at a damp spot on the wall. A true expert will assess the interior and exterior of your home to pinpoint the source of the water. They’ll look for cracks in the concrete, signs of shifting, and evidence of hydrostatic pressure. Since most water issues are related to the soil and drainage around your foundation, the inspection will also include an evaluation of your property’s grading, gutters, and downspouts. This initial assessment is critical because it determines the exact strategy needed for an effective foundation repair and waterproofing plan.
How Waterproofing Is Applied
Once the problem has been diagnosed, the team will apply the waterproofing materials. For the most effective barrier, it’s best to apply sealants to both the interior and exterior of the foundation walls. Exterior waterproofing is the most comprehensive method and involves excavating the soil around your foundation to expose the walls. A waterproof membrane or sealant is then applied directly to the concrete, stopping water before it can even touch your foundation. Interior methods involve applying special coatings, sealants, or panels to the inside of your basement walls to prevent water from seeping through. The right approach depends on your home’s specific issues.
How Drainage Systems Are Installed
Waterproofing materials create a barrier, but you also need a way to manage the water that collects around your foundation. That’s where drainage systems come in. After an exterior membrane is applied, a contractor will often install a French drain—a perforated pipe surrounded by gravel—in the trench at the base of your foundation. This system collects groundwater and channels it safely away from your home. For interior systems, a drainage channel is often placed along the inside perimeter of the basement floor to direct any intruding water to a sump pump, which then pumps it out and away from the house.
Ensuring a High-Quality Job
A professional job doesn’t end once the membrane is on the wall. If excavation was done, the team will carefully backfill the soil to avoid damaging the new waterproof barrier. The final step should always be a thorough cleanup and a final walkthrough with you. This is your chance to ask questions and understand the work that was completed. It’s also important to be mindful of the new membrane yourself. A common mistake is accidentally puncturing the barrier during later landscaping or construction projects. A quality contractor will provide a solid warranty, giving you peace of mind that the job was done right.
Breaking Down the Cost of Waterproofing
Thinking about the cost of waterproofing can feel a bit overwhelming, but it’s one of the most important investments you can make in your home. The final price tag depends on several factors, including the size of your basement, the severity of the water problem, and the specific methods used to fix it. A simple interior sealant will cost much less than a full exterior excavation and drainage system, for example.
Think of it less as a cost and more as a permanent solution to protect your property. The goal is to find the right fix for your specific situation. To give you a clearer picture, let’s break down the main components that make up the total cost: the materials for the job, the labor to get it done right, the long-term value it adds to your home, and the peace of mind that comes with a solid warranty. Understanding these elements will help you make an informed decision and see why professional waterproofing is a worthwhile investment.
What You’ll Pay for Materials
The materials used for waterproofing can range from simple coatings to complex drainage systems. On the lower end, you have waterproof paints and sealants, which can cost anywhere from $1 to $6 per square foot. These are great for minor dampness and act as a first line of defense by creating a barrier on your concrete walls. However, they are often a temporary fix for more serious water intrusion.
For more persistent leaks, the materials get more advanced. This could include interior drainage channels, vapor barriers, sump pumps, or exterior waterproof membranes. While the upfront cost for these materials is higher, they are part of a comprehensive system designed to manage and redirect water away from your foundation permanently. Choosing the right materials is key to a lasting solution.
Factoring in Labor Costs
Labor is a significant part of any waterproofing project, and for good reason—this is not a job where you want to cut corners. The cost of labor varies depending on the complexity of the work. For instance, installing an interior drainage system is often priced per linear foot, which can range from $50 to $100. This covers the skilled work of cutting into the concrete and setting up the system correctly.
More intensive jobs, like exterior waterproofing that requires excavation, will have higher labor costs due to the heavy machinery and time involved. While it might be tempting to save money with a DIY approach, professional installation ensures that every step, from sealing cracks to grading the soil, is done right. Proper crack injection and corrosion repair by an expert prevents future headaches and more costly repairs.
The Long-Term Value of a Dry Basement
Waterproofing your basement is more than just a repair; it’s an investment that pays off in the long run. A dry, healthy basement protects your home’s structural integrity by preventing foundation decay, mold growth, and pest infestations. This not only saves you from expensive future repairs but also improves your home’s energy efficiency, as damp air is harder to heat and cool.
Beyond protection, a waterproofed basement significantly increases your property value. It transforms a damp, unusable space into potential living area—think a home office, gym, or family room. When it comes time to sell, a dry basement is a huge selling point that gives buyers confidence. It shows that you’ve taken excellent care of your home’s foundation repair needs, making your property far more attractive on the market.
Understanding Your Warranty
A good warranty is your assurance that the waterproofing work is built to last. Most reputable waterproofing solutions come with a warranty, typically ranging from 10 to 25 years. This is a company’s promise to stand behind their materials and workmanship, giving you peace of mind that your investment is protected. If an issue arises with the repair during the warranty period, the company will address it.
When you hire a contractor, always ask about the warranty details. At Bristol FX, we offer extensive warranties, including lifetime warranties on services like our push and helical pier installations, because we are confident in our methods and materials. Be sure to read the fine print to understand what’s covered—whether it’s materials, labor, or both—and if the warranty is transferable to a new homeowner.
How to Keep Your Basement Dry for Good
Once your basement is dry, the goal is to keep it that way. Waterproofing isn’t just a one-time fix; it’s about creating a long-term strategy to protect your home from water intrusion. A little proactive maintenance goes a long way in preventing future headaches and costly repairs. By staying vigilant and addressing small issues before they escalate, you can ensure your basement remains a healthy, usable space for years to come. Think of it as simple, routine care for one of your home’s most important structural components. These straightforward habits will help you maintain the integrity of your foundation and the value of your property.
Create a Regular Inspection Routine
Making a habit of inspecting your basement every few months can save you a lot of trouble down the road. This doesn’t have to be an intensive process—just a quick walkthrough to spot potential issues before they become major problems. Keep an eye out for new cracks in the walls or floor, damp spots, peeling paint, or a white, chalky substance called efflorescence, which indicates moisture. Also, take a moment to check that your sump pump and any interior drainage systems are functioning correctly. Catching these early warning signs allows you to address them quickly, often with a simple fix before serious foundation repair is needed.
Manage Your Gutters and Drains
Your home’s first line of defense against a wet basement is actually outside. Gutters and downspouts are designed to collect rainwater and direct it safely away from your foundation. If they’re clogged with leaves and debris, that water will overflow and pool right next to your basement walls, creating immense pressure. Make sure to clean your gutters at least twice a year and check that your downspouts extend several feet from the house. This simple step is one of the most effective ways to prevent water from seeping into your basement and is a critical part of any comprehensive waterproofing strategy.
Waterproofing Mistakes to Avoid
When it comes to keeping your basement dry, some common missteps can unfortunately make the problem worse. One of the biggest mistakes is focusing only on interior fixes without addressing the exterior cause. Simply painting over a damp spot or sealing a crack from the inside is a temporary patch, not a solution. The water pressure from outside will eventually push through again. Another oversight is neglecting routine maintenance on your sump pump or gutters. These systems need to be in good working order to do their job. True solutions often require professional crack injection that addresses the issue at its source.
Should You DIY or Hire a Pro?
While the DIY route can be tempting for home projects, basement waterproofing is one area where professional expertise is invaluable. Waterproofing often involves specialized knowledge of soil conditions, hydrostatic pressure, and the right materials for the job. A DIY attempt might miss the root cause of the leak, leading to recurring issues and even more expensive damage later on. Professionals have the right tools and experience to diagnose the problem correctly and implement a lasting solution. By hiring a professional, you’re not just paying for a service; you’re investing in peace of mind and protecting the structural integrity of your home.
Related Articles
- Waterproofing Services – Professional Foundation Repair
- Foundation Waterproofing Solutions | Bristol FX
- Waterproofing – Professional Foundation Repair
Frequently Asked Questions
Is interior or exterior waterproofing the better option for my home? This is a great question, and the honest answer is that it depends entirely on the root cause of your water problem. Exterior waterproofing is often considered the most thorough approach because it stops water before it can even touch your foundation walls. However, it’s also more invasive. Interior water management systems are incredibly effective and are a fantastic solution when excavation isn’t practical. The best choice for you will come from a professional assessment that pinpoints exactly how and why water is getting in.
I only see a tiny crack and a little dampness. Can I just patch it myself? It’s tempting to think a small crack only needs a small, quick fix, but that crack is often just a symptom of a bigger issue. Water pressure from the soil outside is incredibly powerful, and a simple patch from the hardware store won’t hold up against it for long. That tiny crack could be a sign of foundation shifting or significant hydrostatic pressure. Having a professional diagnose the cause ensures you get a permanent solution, not just a temporary bandage.
Will waterproofing finally get rid of that musty smell in my basement? Yes, absolutely. That damp, musty odor is caused by mold and mildew, which thrive in moist environments. When you professionally waterproof your basement, you eliminate the water source that these growths need to survive. By creating a permanently dry space, you’re not just stopping leaks—you’re improving the air quality in your entire home and getting rid of that unpleasant smell for good.
How disruptive is a waterproofing project, especially if it involves digging? We understand that the thought of excavation can be stressful. While exterior waterproofing is more involved than interior work, a professional team works efficiently to minimize the disruption to your home and yard. The process is systematic, and great care is taken to protect your property during the project. After the work is done, the soil is carefully backfilled and graded to leave your landscape in the best possible condition.
How long does a typical waterproofing project take to complete? The timeline really depends on the scope of the work. A straightforward interior drainage system might only take a few days from start to finish. A more comprehensive exterior project that requires excavation will naturally take longer, potentially a week or more, depending on the size of your home and the complexity of the job. Your contractor should give you a clear and realistic timeline after the initial inspection so you know exactly what to expect.