Your crawl space could be one of the biggest sources of energy loss in your entire home. An uninsulated space with a dirt floor and open vents allows cold winter air to chill your floors and pipes, forcing your heating system to work overtime. In the summer, humid air enters and makes your air conditioner struggle to keep your home comfortable. This constant battle with outside temperatures leads to unnecessarily high utility bills. Learning how to insulate a crawl space with a dirt floor is a smart investment that pays for itself in energy savings. By creating a sealed, insulated barrier, you stop this energy drain, making your home more comfortable and efficient all year round.
Key Takeaways
- Create a dry foundation by sealing out moisture: Your first and most important job is to stop dampness at its source. This involves laying a heavy-duty vapor barrier across the entire dirt floor and sealing off old vents to block moisture from the ground and humid outside air.
- Insulate the walls, not the ceiling, with the right material: To properly regulate temperature and save on energy, attach rigid foam board insulation directly to the foundation walls. Never use fiberglass batts, which act like a sponge for moisture, and avoid insulating the ceiling, which can trap damp, cold air against your floors.
- Look for red flags before you start: A successful project depends on a clean slate. Before sealing anything, check for standing water, persistent dampness, mold, or high radon levels. Covering these issues will only make them worse, so it’s crucial to resolve them—often with professional help—before you begin.
Why Your Crawl Space Needs Attention
It’s easy to forget about your crawl space. After all, it’s out of sight and not exactly a place you visit often. But what happens down there has a major impact on the rest of your home, from the air you breathe to the stability of your floors. An unfinished crawl space, especially one with a dirt floor, is an open invitation for moisture, mold, pests, and structural problems. Ignoring it doesn’t make these issues go away; it just gives them time to get worse, leading to costly damage that could have been prevented.
Think of your crawl space as the foundation of your home’s health. A significant portion of the air in your living area—sometimes as much as 60%—actually circulates up from below. If your crawl space is damp, musty, and filled with allergens, that’s the air your family is breathing day in and day out. This persistent moisture can also lead to wood rot in your floor joists and subfloor, compromising your home’s structural integrity over time. Addressing these issues with professional crawl-space repairs isn’t just about routine maintenance; it’s a crucial step in protecting your home’s value and your family’s well-being. By tackling the root causes of these problems, you can create a healthier, more comfortable, and more energy-efficient living environment from the ground up.
The Problem with Dirt Floors
Most older homes have a crawl space with a simple dirt floor. While it might seem harmless, that exposed earth is a constant source of moisture. Water vapor from the ground continuously evaporates into the crawl space, raising the humidity level. This damp, dark environment is the perfect breeding ground for mold, mildew, and dust mites. It also attracts pests like termites, spiders, and rodents who are looking for a sheltered, humid place to live. This persistent moisture makes any existing insulation less effective and can begin to rot the wooden structures of your home, like support beams and floor joists.
How Moisture Impacts Your Home
You might be surprised to learn that a large portion of the air on the first floor of your home originates in the crawl space. This phenomenon, known as the “stack effect,” means that any mold spores, musty odors, and pest droppings from below are pulled directly into your living areas. This can seriously affect your home’s air quality and trigger allergies or respiratory issues. Beyond air quality, that same moisture can cause hardwood floors to buckle and warp. It also makes your home less energy-efficient, as damp air costs more to heat and cool, leading to higher utility bills. Effective waterproofing is key to stopping this cycle and protecting your home from the ground up.
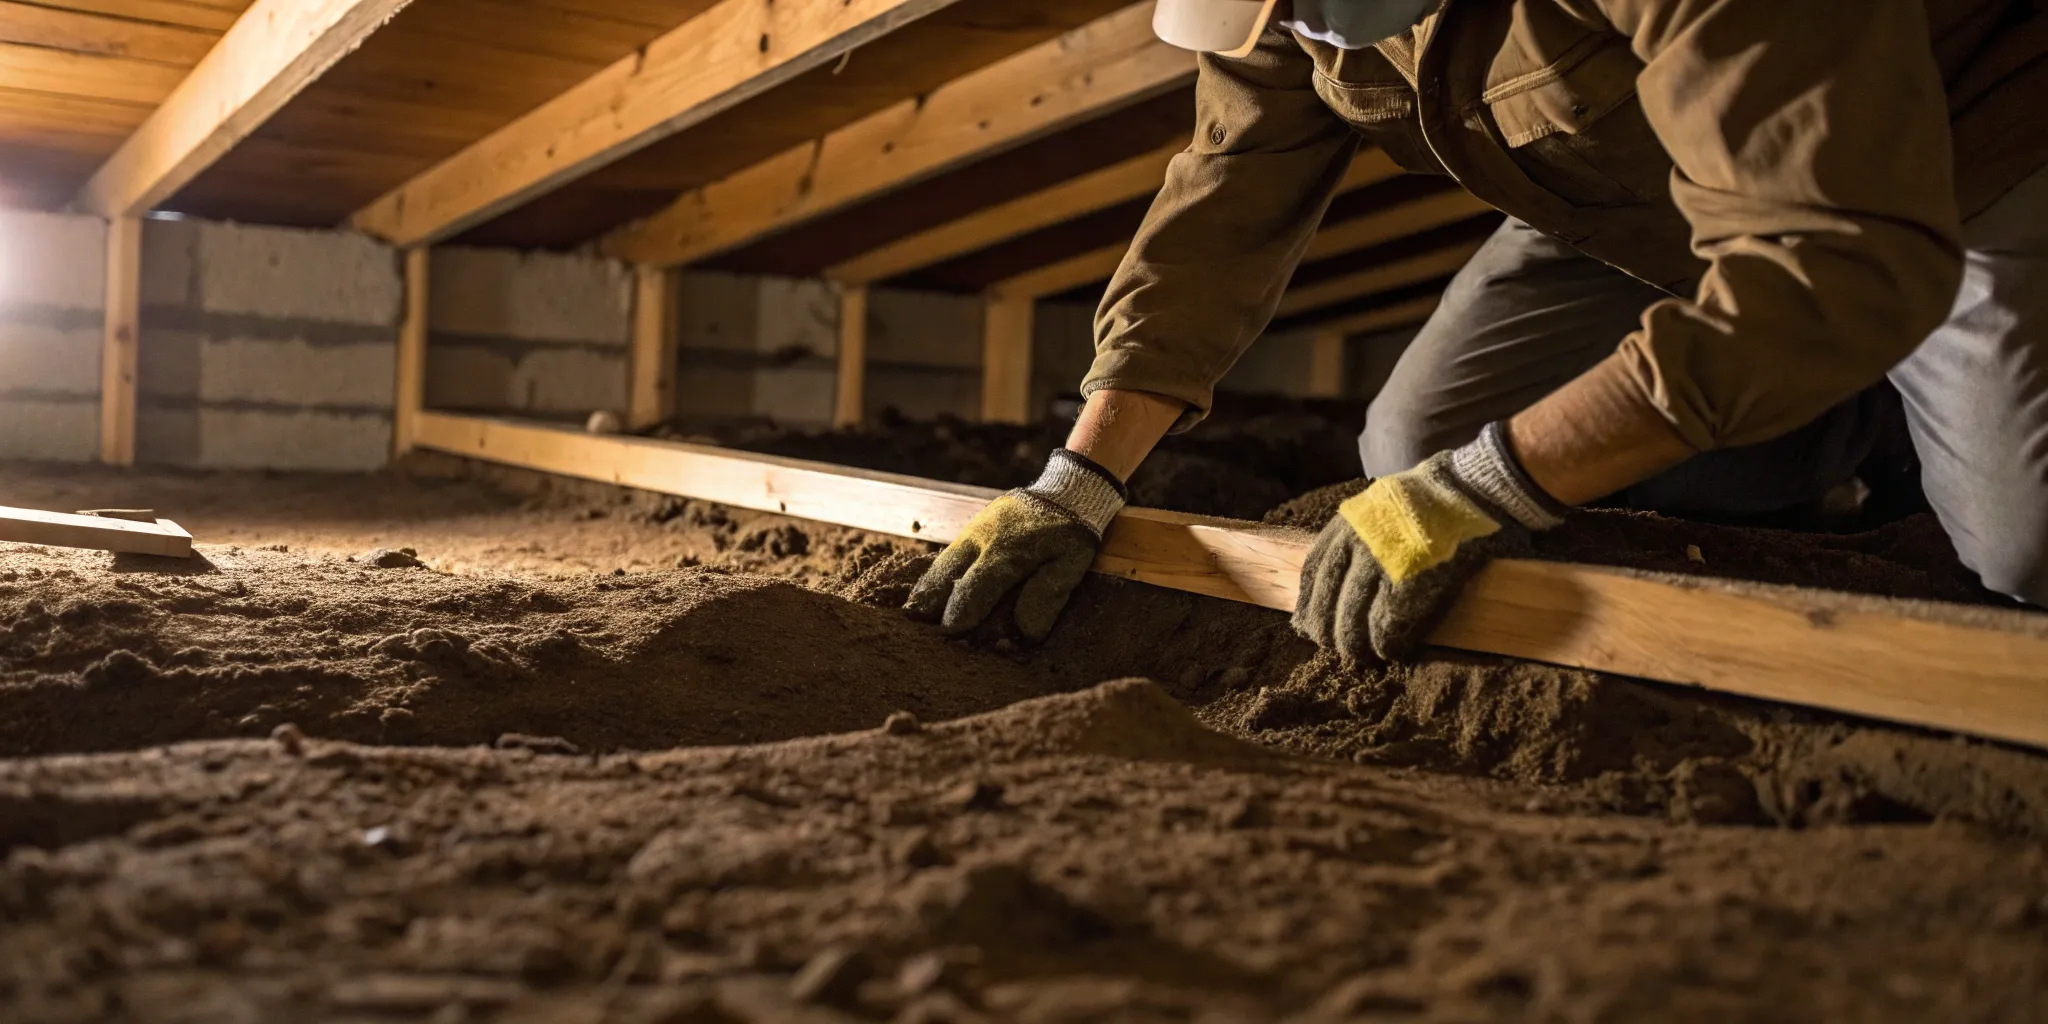
How to Prep Your Crawl Space
Before you can even think about laying down insulation or a vapor barrier, you need to get your crawl space ready. Think of it like prepping a wall before you paint—if you don’t clean and prime it first, the paint will peel and fail. The same principle applies here. A successful insulation project depends entirely on creating a clean, dry, and sealed environment. Taking the time to handle these prep steps will ensure your hard work pays off by protecting your home from moisture, pests, and energy loss for years to come. Skipping this stage can trap existing problems, leading to mold, wood rot, and poor air quality that can affect your entire house. Let’s walk through exactly what you need to do to set your project up for success.
Fix Leaks and Improve Drainage
The number one enemy of a healthy crawl space is water. Before you seal anything up, you have to stop moisture from getting in. Start outside by checking your gutters and downspouts. Make sure they are clean and extend far enough to direct rainwater away from your foundation. The ground should also slope away from your house, not toward it. If you notice persistent dampness, puddles, or active leaks after a storm, you may be dealing with a bigger issue. Simply covering a damp dirt floor will only trap the moisture. For significant water problems, a more robust waterproofing solution, like an interior drainage system or a sump pump, might be necessary to keep the area permanently dry.
Seal Vents and Air Gaps
For decades, building codes required crawl space vents with the idea that they would let moisture out. We now know they do the opposite, letting humid summer air and cold winter drafts in. This outside air causes condensation, encourages mold growth, and makes your home less energy-efficient. The first step is to seal these vents completely from the outside using airtight covers. Next, grab a flashlight and look for any other gaps or cracks. Pay close attention to where pipes, wires, and ducts enter the crawl space. You can use caulk or spray foam to seal these smaller air leaks, creating a truly separated space. This is a fundamental part of professional crawl-space repairs for a reason—it works.
Clear Out Debris and Level the Ground
Crawl spaces can easily become a dumping ground for construction scraps, old junk, and organic material like wood and leaves. All of it has to go. Removing this debris is non-negotiable, as organic matter can rot and attract pests, while sharp rocks or objects can puncture the vapor barrier you’ll install later. Once the space is clear, take a look at the ground itself. It’s often uneven and bumpy. Do your best to rake it and create a relatively smooth, level surface. This will make it much easier to lay down your vapor barrier flat and without any gaps, ensuring a tight and effective seal against moisture from the ground.
Test for Radon Gas
This is a critical safety step you can’t afford to miss. Radon is an invisible, odorless, radioactive gas that seeps up from the soil and can cause lung cancer. When a crawl space is vented, radon gas has a way to escape. However, when you seal it as part of an insulation project, you can inadvertently trap the gas, allowing it to build up to dangerous concentrations inside your home. Before you seal your vents and floor, test for radon. You can find DIY kits at most hardware stores, or you can hire a professional for the most accurate results. If the test comes back high, you will need to have a radon mitigation system installed before proceeding with your project.
Install a Vapor Barrier: Your First Defense Against Moisture
Once your crawl space is clean, dry, and sealed, it’s time for the most important step in managing a dirt floor: installing a vapor barrier. Think of this as a durable, waterproof liner that separates your home from the damp earth below. The ground constantly releases water vapor, and without a barrier, that moisture rises directly into your crawl space, leading to high humidity, mold growth, and wood rot. A properly installed vapor barrier is your first and best line of defense.
Putting a heavy-duty plastic sheet over the entire dirt floor and up the foundation walls effectively seals off the ground. This single step stops moisture at its source, preventing it from ever entering your home’s environment. While it might seem straightforward, the quality of the material and the precision of the installation make all the difference. This process is a cornerstone of professional crawl-space repairs and is essential for creating a healthy, stable foundation for your home. It’s the foundation of a dry crawl space, setting the stage for any insulation you add later.
Choose the Right Vapor Barrier Material
When selecting a vapor barrier, not just any plastic sheeting will do. You need a material that is specifically designed for crawl spaces—one that’s thick, durable, and resistant to punctures and decay. Look for a cross-laminated polyethylene sheet with a thickness of at least 10-mil, though 20-mil is even better for maximum protection and longevity. Thinner, cheaper plastics can tear easily during installation or become brittle over time, compromising the entire system. A high-quality vapor barrier is an investment in your home’s long-term health, ensuring the ground moisture stays where it belongs. This is a key component of any effective waterproofing strategy for your home’s lower level.
A Step-by-Step Guide to Installation
Installing the vapor barrier correctly is just as important as choosing the right material. Start by laying the plastic sheeting across the entire dirt floor, beginning in one corner and working your way across. You’ll want to overlap any seams by at least 6 to 12 inches to prevent moisture from seeping through the gaps. Extend the barrier up the foundation walls by at least six inches and secure it temporarily. Make sure to carefully cut the material to fit snugly around any support piers, pipes, or other obstructions, as these are common weak points where moisture can find a way in. Taking your time here ensures a continuous, unbroken shield against ground vapor.
Seal It Right for the Best Results
To create a truly effective barrier, you need to seal all the seams and edges. While some might skip this step, sealing is crucial for creating an airtight and moisture-proof system, especially if you plan to fully encapsulate the crawl space. Use a specialized seam tape designed for vapor barriers—regular duct tape will fail quickly in a damp environment. Carefully tape all overlapping seams, seal the barrier around all piers and pipes, and secure the top edge of the liner to the foundation walls with a permanent adhesive or mechanical fasteners. This meticulous sealing is what transforms a simple plastic sheet into a comprehensive moisture control solution, a hallmark of professional crawl-space repairs.
Select and Install Wall Insulation
Once your vapor barrier is down, the next step is insulating the crawl space walls. This is where you really start to control the temperature and make your home more energy-efficient. Insulating the walls, rather than the ceiling, helps bring the crawl space into the conditioned envelope of your home. This approach keeps the space warmer in the winter and cooler in the summer, which protects your pipes from freezing and reduces the strain on your HVAC system. It’s a proactive measure that pays off in both comfort and lower utility bills.
Choosing the right material is absolutely critical here. A crawl space is a naturally damp environment, even with a vapor barrier. The wrong insulation can absorb moisture, grow mold, and fail completely, wasting your time and money. This isn’t just about comfort; it’s a key part of a complete waterproofing strategy that protects your home’s structural integrity. By creating a continuous thermal barrier, you’re not only saving on energy bills but also contributing to a healthier, more stable foundation for your entire house. Proper insulation works hand-in-hand with moisture control to prevent the kind of long-term damage that leads to expensive repairs down the road.
Why Foam Board Is Your Best Bet
When it comes to insulating your crawl space walls, rigid foam board is the only way to go. It’s the ideal choice because it resists moisture and provides excellent thermal resistance. Unlike other materials, foam board won’t get waterlogged or become a breeding ground for mold and mildew if it comes into contact with dampness. This durability is essential for the long-term health of your crawl space.
You should never use fiberglass batt insulation in a crawl space. While it’s common in attics and walls, it acts like a sponge below your home. It will absorb any available moisture, become heavy, and sag out of place, rendering it completely ineffective. This can trap moisture against your wooden floor joists, leading to rot and other serious issues that require professional crawl-space repairs. Stick with foam board for a solution that lasts.
How to Install Insulation Correctly
Proper installation is just as important as choosing the right material. Start by cutting the rigid foam boards to fit snugly against the foundation walls, placing them between the ground and the bottom of the floor joists. The goal is to create a continuous, unbroken barrier with no gaps. You can secure the boards to the concrete or block walls using a special foam-safe adhesive.
Next, turn your attention to the rim joists—the wooden frame that sits on top of your foundation walls. This area is a major source of air leaks. Seal every gap and seam in the rim joist area with spray foam insulation for an airtight seal. Remember, you are insulating the walls, not the ceiling. Insulating the crawl space ceiling can trap cold air and moisture around your pipes and subfloor, which is the exact opposite of what you want to achieve.
Go a Step Further with Moisture Control
Installing a vapor barrier and wall insulation makes a massive difference in your crawl space. You’ve essentially put up a shield against ground moisture and outside air. But if you live in a particularly humid climate or want to create the healthiest possible environment under your home, you can take moisture management to the next level. These final steps move beyond basic protection and create a fully controlled, conditioned space that actively works to stay dry.
Taking these extra measures is about more than just preventing musty smells. It’s about protecting your home’s structural integrity from rot and your family’s health from mold and poor air quality. A completely dry crawl space means your HVAC system runs more efficiently, potentially lowering your energy bills. If you’re ready to solve moisture problems for good, a few advanced crawl-space repairs can offer total peace of mind.
Consider Full Crawl Space Encapsulation
If you want the gold standard of crawl space protection, look no further than full encapsulation. This process involves completely sealing the entire crawl space from outside air and ground moisture. A heavy-duty vapor barrier is installed across the dirt floor and up the walls, with all seams taped and sealed. Vents are closed off, and the space is insulated to create a clean, dry, and conditioned area that’s more like a mini-basement than a damp crawl space.
This comprehensive approach is the most effective way to stop moisture, mold, and pests in their tracks. By creating a controlled environment, encapsulation improves your home’s indoor air quality and makes the space safe for storage. It’s a premier waterproofing solution that transforms the area beneath your home.
Add a Dehumidifier to Control Humidity
Encapsulation stops moisture from entering, but a dehumidifier actively removes any humidity that remains in the air. Installing a professional-grade dehumidifier is the final step in creating a truly dry crawl space. These units are designed to maintain a specific, low humidity level automatically, ensuring the environment stays stable year-round. This prevents any chance of condensation forming on your floor joists or pipes.
Keeping the air dry ensures your insulation performs at its best and eliminates the damp conditions that mold and pests need to thrive. Your heating and cooling systems won’t have to work as hard to condition damp air, which can save you money on utility bills. It’s a critical component of a complete crawl-space repair system that protects your foundation for the long haul.
How to Maintain Your New and Improved Crawl Space
Once your crawl space is sealed and insulated, it’s tempting to close the access door and forget about it. But a little bit of regular maintenance goes a long way in protecting your investment and your home. Think of it like any other major home improvement—it needs occasional check-ins to perform its best. By staying proactive, you can ensure your crawl space remains dry, clean, and efficient for years to come, preventing small issues from turning into major headaches. Here are a few simple habits to adopt.
Create a Regular Inspection Checklist
Your first line of defense starts outside your home. A simple, regular inspection can save you a lot of trouble. At least twice a year, especially in the spring and fall, walk around your property and check that your gutters are clean and your downspouts are directing water far away from the foundation. The ground should also slope away from your house, not toward it. These simple steps help prevent water from pooling near your foundation and seeping into the crawl space, which is a crucial part of any effective waterproofing strategy. Keeping a checklist makes this process quick and ensures you don’t miss anything.
Keep an Eye on Humidity Levels
Even with a vapor barrier and sealed vents, it’s smart to monitor the humidity in your crawl space. High humidity can lead to mold growth and musty odors, defeating the purpose of all your hard work. You can get an inexpensive digital hygrometer to track the levels. If you find the humidity is consistently high (above 50-60%), running a dehumidifier is an excellent solution to keep the air dry and protect your insulation and floor joists. This is a key component of comprehensive crawl-space repairs and ensures the space remains a healthy, stable part of your home.
Prevent Pest Infestations
A dark, quiet crawl space can be an open invitation for pests like rodents and insects, which can cause serious damage to your new insulation. During your regular inspections, look for any signs of pest activity, like droppings or chewed materials. When sealing the space, professionals often add a layer of metal mesh to block entry points for determined critters. If you suspect you have an infestation, it’s best to call a pest control expert right away. Protecting your crawl space from pests is just as important as protecting it from moisture, ensuring it remains a clean and structurally sound area of your home.
Know When to Call a Professional
While insulating a crawl space can be a manageable DIY project, there are times when it’s smarter and safer to call in a professional. Recognizing the difference can save you from costly mistakes and ensure the job is done right. If you encounter complex challenges or signs of more significant problems, pausing and getting an expert opinion is the best course of action for your home’s long-term health. A professional can assess the situation accurately and provide a lasting solution, not just a temporary fix.
When the Job Gets Complicated
Let’s be honest: crawl spaces aren’t always easy to work in. They can be cramped, the ground is often uneven, and you might find debris that needs to be cleared before you can even start. If the physical work of leveling the ground and maneuvering in a tight space feels overwhelming, a professional crew has the experience and equipment to handle it efficiently. More importantly, if you’ve tested for radon and the results are high, simply venting the space isn’t enough. Radon requires a specialized mitigation system to truly protect your family’s health. These are situations where professional crawl-space repairs are not just a convenience but a necessity.
Spotting Signs of Major Issues
Before you lay down a single sheet of insulation, take a hard look around. Do you see signs of mold or mildew? Is there standing water or are the soil and foundation walls persistently damp? These are red flags indicating a bigger problem that insulation will only cover up, not solve. Moisture from a dirt floor can constantly rise into your home, leading to wood rot, poor air quality, and pest infestations. Simply covering the source won’t stop the damage. If you notice these warning signs, it’s time to call an expert. A professional can identify the source of the moisture and recommend effective waterproofing solutions to protect your foundation.
Related Articles
- Crawl-Space Repair – Bristol FX
- How Proper Water Drainage Can Protect Your Home’s Foundation – Professional Foundation Repair
- Foundation Repair – Professional Foundation Repair
- What You Should Know About Polyurethane Foam Foundation Leveling – Professional Foundation Repair
- Waterproofing – Professional Foundation Repair
Frequently Asked Questions
Why do I need to seal my crawl space vents? I thought they were supposed to let air circulate. That’s a common belief, but building science has shown us that vents often cause more problems than they solve. The original idea was that vents would allow moisture to escape, but they actually tend to let humid air in during the summer and cold air in during the winter. This outside air leads to condensation, which raises the humidity, encourages mold growth, and makes your home less energy-efficient. Sealing the vents and treating the crawl space as a conditioned part of your home is the modern, effective way to keep it dry and stable.
What’s the difference between putting down a vapor barrier and full encapsulation? Think of a vapor barrier as the essential first step. It’s a heavy-duty liner that covers the dirt floor to stop moisture from the ground from seeping up. Full encapsulation takes this concept to the next level by completely sealing the entire space. This means the vapor barrier extends up the foundation walls, all seams are taped, and the vents are permanently sealed. Encapsulation creates a totally isolated and controlled environment, which is the most comprehensive solution for preventing moisture, pests, and air quality issues.
I already have fiberglass insulation between my floor joists. Is that good enough? Unfortunately, that old-style insulation often does more harm than good in a crawl space. Fiberglass batts act like a sponge, absorbing moisture from the air. Over time, they become heavy, sag, and fall out of place, trapping dampness against your subfloor and joists, which can lead to wood rot. The best approach is to remove that ceiling insulation and instead install rigid foam board directly against the foundation walls. This insulates the space without creating a risk for moisture damage.
If I do this myself, what’s the one mistake I absolutely must avoid? The single biggest mistake is sealing everything up before you’ve solved any existing water issues. Laying a vapor barrier over damp soil or insulating walls that have active leaks will only trap the moisture, creating a perfect environment for mold and rot to thrive unseen. Before you cover anything, you must ensure the space is completely dry. This means fixing drainage problems, repairing leaks, and making sure water isn’t seeping through the foundation walls.
My crawl space doesn’t have standing water, just a damp, earthy smell. Is it still a problem? Yes, that smell is a clear warning sign. It indicates high humidity and the presence of mold or mildew, even if you can’t see it. A significant amount of the air in your home circulates up from the crawl space, so you’re breathing in that musty air. That persistent dampness is also slowly damaging the wooden structures of your home and making your HVAC system work harder. Addressing the humidity is essential for protecting both your home’s structure and your family’s health.