That crack in your retaining wall might seem small now, but it’s a symptom of a much larger battle. Every day, your wall fights against the immense pressure of the earth and the powerful force of water. When it starts to lean, bulge, or crack, it’s telling you it’s losing that fight. A failing wall isn’t just an eyesore; it’s a serious structural problem that can lead to soil erosion, property damage, and even threaten your home’s foundation. Understanding the root cause of the failure is the first step toward a lasting solution. This guide will help you diagnose the problem and explore the right retaining wall repair options.
Key Takeaways
- Be proactive with regular inspections: The best way to prevent a costly collapse is to catch problems early. A few times a year, walk your wall and look for signs of trouble like leaning, new cracks, or water pooling at the base.
- Distinguish between a DIY fix and a professional job: You can tackle small cracks and replace a single block, but it’s crucial to call an expert for walls over four feet tall or those with significant leaning or bulging. A professional ensures the repair is safe and addresses the root cause.
- Prioritize drainage and quality materials for a lasting solution: A simple patch won’t fix a wall that’s failing due to water pressure. A successful repair always addresses the root cause with a proper drainage system and uses materials specifically engineered to withstand constant pressure.
Is Your Retaining Wall Failing? Here’s How to Tell
Retaining walls are the unsung heroes of many properties, quietly holding back soil to create usable, level ground. But because they work so hard, they’re under constant pressure. Spotting the early signs of failure is the best way to prevent a small problem from turning into a costly and dangerous collapse. A failing wall can threaten your home’s foundation and your yard. Understanding what to look for is the first step toward a solution. Whether your property has a gentle slope or a steep grade, knowing the health of your retaining wall is crucial for effective hillside stabilization. Let’s walk through how to identify your wall type, recognize the signs of trouble, and understand why these structures fail.
Know Your Wall: Common Types
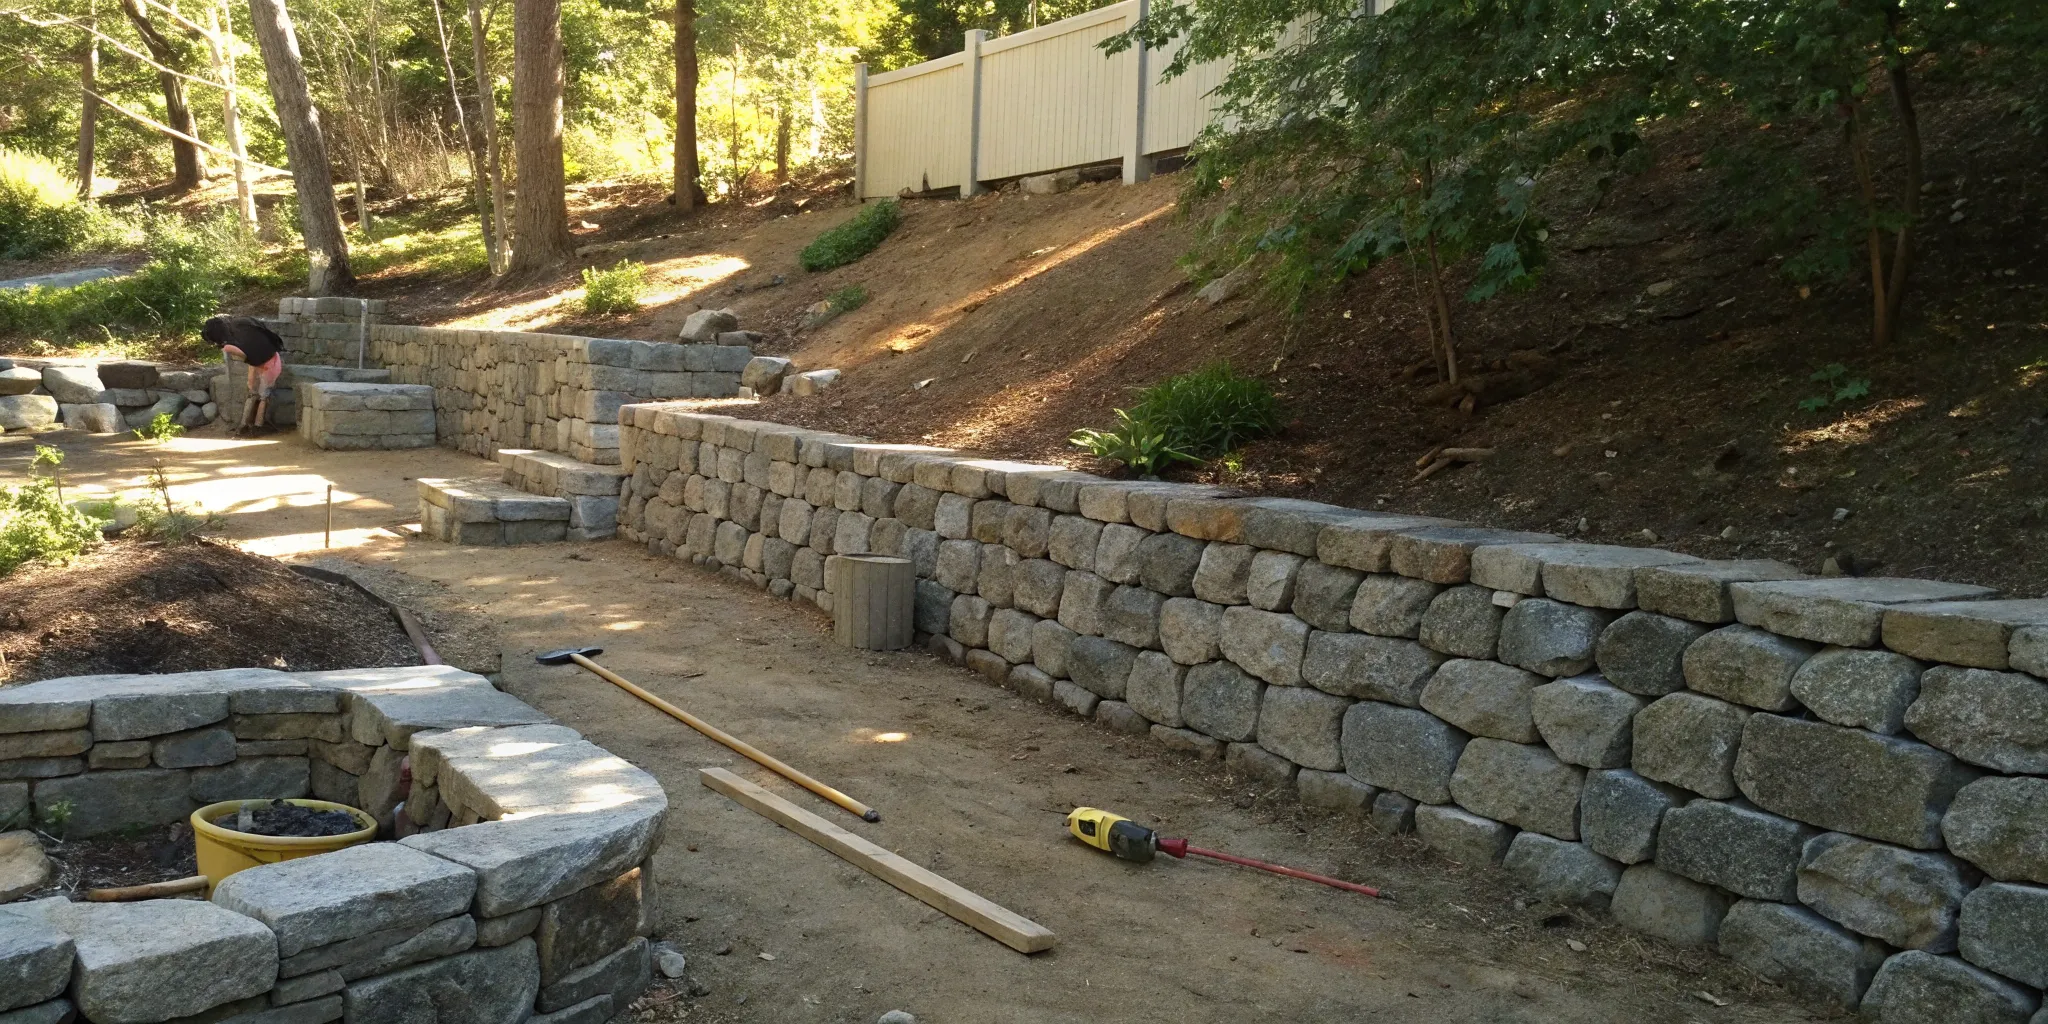
Before you can spot a problem, it helps to know what you’re looking at. A retaining wall is any structure designed to hold back soil, but they come in a few common designs. Gravity walls are the simplest, using their sheer weight (often from stone or concrete blocks) to hold back the earth. Cantilevered walls use a reinforced concrete footing for leverage, while sheet pile walls are often used in tighter spaces and rely on long sections of steel or wood driven into the ground. Knowing your wall’s construction helps you understand its potential weak points.
Warning Signs Your Wall Is in Trouble
A retaining wall will almost always give you clues that something is wrong before it fails completely. Don’t ignore these signs, as they often point to deeper structural issues. Keep an eye out for:
- Tilting or Leaning: If the wall is leaning forward or pulling away from the soil, it’s a clear sign of pressure overload.
- Cracking or Crumbling: Significant cracks in concrete or masonry indicate the material is breaking down under stress.
- Bulging: A noticeable bulge in the wall means the pressure behind it is too great.
- Water Pooling: Poor drainage is a major red flag. Water collecting at the base means hydrostatic pressure is building up.
These symptoms are similar to those in a home’s foundation and require professional foundation repair expertise.
Why Retaining Walls Fail
Retaining walls fail for a few key reasons, and most trace back to water and poor construction. The number one culprit is hydrostatic pressure—the force of water-saturated soil pushing against the wall. Without proper drainage, water builds up, adding immense weight. This is why professional waterproofing and drainage systems are so critical. Other common causes include a weak base, using the wrong backfill material, or pressure from nearby tree roots. A lasting repair doesn’t just patch the damage; it fixes the underlying cause of the failure.
Safety First: Prepping for a DIY Repair
Before you start swinging a sledgehammer or even moving a single block, taking the time to prepare your workspace is the most important step. A little planning goes a long way in preventing injuries and ensuring your repair actually lasts. Think of it as setting the stage for a successful project. Rushing into a repair without the right gear or a clear understanding of your environment can lead to bigger problems than the one you started with. From wearing the right protection to knowing what’s under the ground you’re about to dig, these prep steps are non-negotiable for any DIYer.
Gear Up with the Right Safety Equipment
Retaining wall materials are heavy and unforgiving. Start by protecting yourself with the right gear. This means sturdy, steel-toed boots to guard your feet against falling blocks, heavy-duty gloves for a better grip and to prevent cuts, and safety glasses. Don’t underestimate that last one—always wear eye protection when moving wall blocks, as they can weigh 60 to 80 pounds and chip easily, sending small fragments flying. If you’re using power tools to cut blocks or mix mortar, you should also consider hearing protection and a dust mask. Your safety is the top priority, so don’t be tempted to cut corners on protective equipment.
Assess Your Work Area
Take a good look at the wall and the area around it. Before you can fix the problem, you need to understand what caused it. It’s important to fix why the wall failed in the first place, whether it’s an unstable base, invasive tree roots, or poor drainage. If the cause isn’t immediately obvious or seems like a major structural issue, it might be a sign that professional foundation repair is needed. Once you have a plan, clear away any plants, debris, or obstacles from your work zone. This gives you plenty of room to move safely and prevents tripping hazards while you’re carrying heavy materials.
Locate Underground Utilities
This is a critical step you absolutely cannot skip. Before you start any digging, you must check for underground utility lines. Hitting a buried electrical, gas, or water line is incredibly dangerous and can lead to costly damages and service outages for your neighborhood. The good news is that it’s easy and free to avoid this. Simply call 811 or visit your local “call before you dig” website a few days before you plan to start your project. They will send a professional out to mark the location of any buried lines on your property, giving you a clear map of where it’s safe to dig.
Plan Around the Weather
Working with soil, concrete, and mortar is much easier and more effective in the right conditions. The best time to repair a retaining wall is when the ground is dry, which is typically in the spring or summer. Trying to work with wet, muddy soil is difficult, messy, and can compromise the stability of your base and backfill. Mortar and concrete adhesives also need dry weather to cure properly, ensuring a strong, lasting bond. Before you begin, check the forecast and plan your repair for a clear, dry stretch of days. This patience will pay off by giving your work the best chance to set correctly and stand strong for years to come.
How to Tackle Minor Retaining Wall Repairs
Ready to get your hands dirty? If you’ve determined your retaining wall has minor issues, like a few small cracks or a slightly shifted block, you can often handle the repairs yourself. Taking the time to fix small problems now can prevent them from turning into major headaches later. The key is to work carefully and methodically.
Think of it like this: a solid repair restores not just the look of your wall, but also its strength. Let’s walk through the essential steps to get your wall back in top shape.
Gather Your Tools and Materials
Before you start, gather everything you’ll need. There’s nothing worse than having to stop mid-project for a trip to the hardware store. For most minor retaining wall repairs, you’ll want to have a level, shovel, caulking gun, tamping tool, wheelbarrow, and a stiff broom or shop vacuum for cleanup. A sledgehammer might be necessary for breaking up old, damaged blocks.
Most importantly, don’t forget your safety gear—sturdy gloves and eye protection are a must. Having all your tools and materials laid out and ready to go will make the entire process smoother and safer.
Fix Minor Cracks
Hairline cracks might not seem like a big deal, but they can let water seep in, which can cause bigger problems over time, especially during freeze-thaw cycles. For small cracks, you can use a concrete patching compound or a high-quality polyurethane caulk. First, clean the area thoroughly with a wire brush and broom to remove any loose debris, dirt, or dust.
Apply the patching material with a caulking gun or putty knife, making sure to press it firmly into the crack. For more significant fractures, a simple patch won’t be enough. Deeper or wider cracks often point to underlying structural stress that requires a professional approach, like the crack injection services we use to ensure a permanent seal.
Address Drainage Issues
Water is the number one enemy of retaining walls. If water builds up behind your wall, the hydrostatic pressure can cause it to lean, bulge, or even collapse. Proper drainage is your best defense. Start by checking that the wall’s weep holes—the small holes at the base that let water escape—are clear of debris.
If you’re rebuilding a small section of the wall, it’s the perfect time to improve the drainage system. This usually involves placing a perforated pipe at the base and backfilling with a layer of gravel. This creates a channel for water to flow away from the wall. A comprehensive waterproofing strategy is essential for keeping your wall stable for years to come.
Replace Damaged Blocks
If a block is crumbling or severely cracked, it’s best to replace it. Start by carefully removing the damaged block, using a hammer and chisel if needed. Be gentle to avoid disturbing the surrounding blocks. Once it’s out, clean up the space, removing any old mortar or debris.
Check the condition of the old block. If it’s still structurally sound, you might be able to reuse it by simply turning it around. Otherwise, set a new block in its place. Use a level to make sure it’s perfectly aligned with the rest of the wall before securing it with concrete adhesive or mortar.
Backfill Your Wall Correctly
Once your repairs are complete, the final step is to backfill the area behind the wall. Don’t just dump dirt back in! Proper backfilling provides crucial support. The best practice is to add your backfill material—ideally gravel for drainage, followed by soil—in layers.
Add about a foot of material at a time, then use a tamping tool to pack it down firmly. Compacting the backfill prevents it from settling later, which could create voids and put uneven pressure on your wall. For walls on sloped properties, proper backfilling is a key part of overall hillside stabilization and shouldn’t be overlooked.
When to Call a Professional
I love a good DIY project as much as anyone, but it’s crucial to know where to draw the line. While fixing a few minor cracks can be a satisfying weekend task, some retaining wall issues are simply too complex or dangerous to handle on your own. Getting in over your head can lead to a bigger, more expensive problem, or worse, a total wall collapse. The key is recognizing when a project requires specialized knowledge, heavy equipment, and an understanding of local building codes. If you spot any of the signs we’re about to cover, putting down the tools and picking up the phone is the smartest—and safest—move you can make. A professional assessment can save you time, money, and a whole lot of stress in the long run.
For Tall or Structurally Compromised Walls
A general rule of thumb is that if your retaining wall is taller than four feet, it’s time to call in the experts. The physics involved with taller walls are much more complex. The amount of pressure from the soil behind the wall—known as hydrostatic pressure—increases dramatically with height. A professional team has the engineering knowledge and equipment to safely manage these forces. If your wall is severely leaning, bulging, or has large, deep cracks, it’s a clear sign of structural compromise. These are not cosmetic issues; they indicate that the wall is failing and could collapse. Attempting a DIY fix on a wall this unstable is a serious safety risk. Professionals can provide solutions like hillside stabilization to ensure a lasting and secure repair.
To Solve Complex Drainage Problems
Water is the number one enemy of retaining walls. If you notice water pooling at the base of your wall, soil washing out through cracks, or the ground behind the wall is constantly soggy, you likely have a significant drainage issue. While you can clear existing weep holes, designing and installing a proper drainage system is a job for a pro. They can implement comprehensive solutions like French drains, perforated pipes, and the correct type of gravel backfill to effectively redirect water away from the wall. A professional waterproofing and drainage strategy addresses the root cause of the failure, preventing you from having to make the same repairs again in a few years.
When an Engineer’s Stamp Is Required
For certain projects, especially those involving walls over three or four feet tall or walls supporting critical structures like a driveway or your home’s foundation, you may need a plan certified by a licensed structural engineer. An engineer’s stamp is a formal approval confirming that the design is safe, sound, and compliant with established standards. This isn’t just red tape; it’s a crucial step to ensure the wall is built to withstand the specific pressures of your property. A professional foundation repair company will work with engineers to create a design that guarantees the stability and longevity of your wall, giving you peace of mind that the job is done right.
If Your Project Needs a Permit
Before you start any significant repair or replacement, you need to check with your local building department. Many cities and counties require a permit for retaining walls that are over a certain height, typically between three and five feet. The permitting process can be complicated, involving detailed plans, site inspections, and a lot of paperwork. Trying to handle this on your own can be a major headache. One of the biggest advantages of hiring a professional contractor is that they manage the entire permitting process for you. They know the local codes and requirements, ensuring your project is fully compliant and avoiding potential fines or legal issues down the road.
A Look at Professional Repair Methods
When a retaining wall shows signs of serious stress, it’s time to look beyond simple fixes. Professional contractors have a toolkit of advanced methods designed to address the root causes of wall failure, from immense soil pressure to persistent water issues. These aren’t just patches; they are engineered solutions meant to provide long-term stability and peace of mind. Understanding these techniques can help you have a more informed conversation with a specialist and choose the right approach for your property. A professional assessment will determine which combination of repairs will restore your wall’s strength and prevent future problems.
Structural Stabilization Techniques
If your wall is leaning, bowing, or has significant structural cracks, the goal is to re-secure it. This often involves more than just replacing a few blocks. Professionals may use specialized hillside stabilization techniques to anchor the wall to stable soil behind it. This can be done with steel tie-backs or anchors that extend deep into the earth, effectively pulling the wall back into alignment and holding it there. In some cases, sections of the wall may need to be carefully dismantled and rebuilt with steel rebar reinforcement to give it the internal strength it needs to withstand pressure.
Advanced Soil Management
Water is the number one enemy of retaining walls. When soil becomes saturated, it gets heavy and exerts immense hydrostatic pressure on your wall. Professionals tackle this with advanced soil and water management systems. This goes beyond a simple French drain. They might install a system of perforated pipes, gravel backfill, and weep holes to give water an easy escape route. This process of waterproofing and drainage management is crucial because it relieves the pressure that causes walls to bow, lean, and eventually fail, ensuring the repair will last.
Comprehensive Waterproofing Systems
A professional waterproofing job is a complete system, not just a coat of sealant. To prevent the drainage system from clogging with silt and soil over time, contractors install a special geotextile fabric liner. This fabric acts as a filter, allowing water to pass through to the gravel and pipes while keeping dirt out. This ensures the drainage system continues to work effectively for years. By combining proper drainage with high-quality waterproofing membranes applied directly to the back of the wall, professionals create a multi-layered defense that keeps your wall’s structure dry and protected from moisture damage.
Wall Reinforcement Options
Sometimes, the soil behind and beneath the wall is the real problem. If the ground is weak or unstable, the wall will continue to shift and settle no matter how well it’s built. In these situations, professionals can use powerful reinforcement methods. One modern solution is injecting polyurethane geotechnical foam into the soil to fill voids, increase stability, and even lift sunken sections of the wall. For the most severe cases, contractors can install push and helical piers deep into the ground to anchor the wall’s foundation to solid, load-bearing soil or bedrock, providing a permanent foundation.
Budgeting for Your Retaining Wall Repair
Planning your budget is one of the most important steps in any home repair project, and retaining walls are no exception. Understanding the potential costs helps you prepare financially and decide whether to tackle the job yourself or bring in a professional. The total expense can vary quite a bit, depending on the size of your wall, the extent of the damage, and the materials you choose. Let’s break down the key costs you should anticipate so you can move forward with confidence.
The Cost of Materials
For a smaller, do-it-yourself repair, the cost of materials is often quite manageable. You can generally expect to spend between $100 and $200 for the supplies needed to fix minor issues. This budget typically covers things like concrete patch kits, replacement blocks, gravel for backfill, and drainage pipes. The final amount will depend on the type of wall you have and the specific products you select. For more extensive damage, you may need more specialized materials, which can increase the cost.
Professional Labor Rates
If your retaining wall is taller than four feet or shows signs of significant structural failure, it’s time to call in a professional. While hiring an expert adds to the overall cost, it’s an investment in safety and quality. A professional crew has the experience to diagnose the root cause of the problem and ensure the repair provides lasting support. This is especially critical for walls that hold back a large amount of soil or are close to your home. Proper hillside stabilization is not a place to cut corners, as a failed wall can cause serious property damage.
Permits and Engineering Fees
Before you start any work, it’s a good idea to check with your local building department about permits. Many municipalities require a permit for repairs on retaining walls over a certain height, often between three and five feet. Skipping this step can lead to fines and may even force you to undo the work. In some cases, a structural engineer may need to review and approve the repair plan, which adds another layer of cost. Working with an experienced contractor can simplify this process, as they are familiar with local codes and can handle the paperwork for you.
How Long Will It Take?
Time is another factor to consider in your budget. A straightforward repair on a small wall might only take between four and eight hours to complete. However, this is just an estimate. The actual time can change based on the complexity of the damage and whether you’re doing the work yourself or hiring a team. A project that requires significant excavation, extensive waterproofing, or the installation of new drainage systems will naturally take longer. When getting quotes from professionals, be sure to ask for an estimated project timeline along with the costs.
Keep Your Wall Strong: A Maintenance Guide
A retaining wall is a hardworking feature of your property, and a little proactive care can save you from major headaches and expenses down the road. Just like any other part of your home, it needs regular attention to stay strong and do its job effectively. By spending a little time on maintenance, you can extend the life of your wall and protect your investment. Think of it as a simple health check-up for your landscape. Here’s a straightforward guide to keeping your retaining wall in top condition for years to come.
Your Regular Inspection Checklist
Making a habit of inspecting your retaining wall a few times a year, especially after heavy rains or seasonal thaws, is the best way to catch problems early. Ignoring small signs of trouble can lead to sudden, more serious issues that compromise your property’s safety.
Grab a notepad and walk the length of your wall, looking for these key indicators:
- Leaning or Bulging: Is any part of the wall tilting forward or bowing outward?
- Cracks: Note any new cracks, especially horizontal ones or “stair-step” cracks in block walls.
- Crumbling Concrete: Look for areas where the material is flaking or breaking apart.
- Water Issues: Do you see water seeping through the wall, or is it pooling at the base?
- Shifting Soil: Check for signs of soil erosion around or behind the wall.
If you spot any of these red flags, it’s a sign that your wall is under stress and may need professional foundation repair.
How to Maintain Your Drainage System
Water is the number one enemy of retaining walls. When water builds up in the soil behind a wall, it creates immense pressure (this is called hydrostatic pressure) that can push the wall over. That’s why a functional drainage system is non-negotiable.
Proper drainage prevents this buildup, and maintaining it is simple. First, locate your wall’s weep holes—small openings at the base that allow water to escape. Use a wire or small tool to ensure they are clear of dirt, leaves, and other debris. You should also check that your yard’s grading and any nearby downspouts direct water away from the wall, not toward it. A well-designed system is the first line of defense, and professional waterproofing can provide a comprehensive, long-term solution.
Tips for Managing Soil and Landscaping
What you do around your retaining wall matters just as much as the wall itself. The soil and landscaping nearby can either support your wall or contribute to its failure. Be mindful of adding extra weight, or “surcharge,” on the soil behind the wall. Avoid piling heavy materials like firewood, extra soil, or construction supplies in that area.
When it comes to planting, choose wisely. The roots of large trees and shrubs can exert incredible pressure as they grow, potentially damaging the wall’s structure from behind. If you want to landscape near the wall, opt for plants with smaller, non-invasive root systems. Proper soil management is a key part of hillside stabilization and is crucial for your wall’s integrity.
Long-Term Wall Monitoring
Beyond your regular inspections, it’s smart to keep a long-term record of your wall’s condition. An easy way to do this is to take photos from the same angles once or twice a year. This creates a visual timeline that makes it easy to spot gradual changes, like a slow lean or a crack that’s widening over time.
Don’t wait too long to address a failing retaining wall. The longer you put it off, the more expensive and extensive the repairs usually become. If your monitoring reveals that a problem is getting progressively worse, it’s time for a professional assessment. An expert can evaluate the underlying cause and determine whether a targeted crack injection or a more comprehensive structural solution is needed to secure your wall for the long haul.
Why Quality Materials Matter
When you’re repairing a retaining wall, the materials you choose are just as important as the techniques you use. Think of them as the foundation of your repair—if they’re not up to the task, the entire project could fail. While it might be tempting to save a few dollars on cheaper alternatives, cutting corners on materials often leads to more significant and costly problems down the road. A retaining wall is constantly fighting against the immense pressure of soil and water, so it needs components that are specifically designed to win that fight day after day.
Using high-quality, purpose-built materials ensures your repair will last. Professional-grade products provide the strength, durability, and resilience needed to withstand the elements and the constant forces of nature. From the concrete blocks that form the structure to the drainage system that protects it, every component plays a critical role. Investing in the right materials from the start is the best way to protect your property and ensure your hard work pays off with a stable, long-lasting wall. This commitment to quality is central to any successful foundation repair project.
The Right Concrete for the Job
Not all concrete is created equal, and this is especially true when it comes to retaining walls. You should always use concrete blocks specifically engineered for retaining wall construction. These blocks are denser and shaped to interlock, creating a much stronger barrier against soil pressure than standard cinder blocks or decorative pavers. Using the wrong type of block is a common mistake that can lead to bowing, cracking, or even a complete collapse. For poured concrete walls, the specific mix and its compressive strength are just as important. A professional can help determine the right specifications to ensure the concrete can handle the load without failing or requiring premature crack injection.
Durable Steel Reinforcement
Concrete is incredibly strong when being squeezed (compression), but it’s relatively weak when being pulled apart (tension). That’s where steel reinforcement comes in. Adding steel rebar to a concrete retaining wall dramatically increases its tensile strength, helping it resist the forces that cause it to lean or bow. For block walls, reinforcement can come in the form of special connectors or pins that lock the blocks together, creating a unified, stronger structure. For taller walls or those holding back a significant amount of earth, proper steel reinforcement isn’t just a good idea—it’s essential for safety and stability. It’s the same principle behind using push and helical piers to support a home’s foundation.
Effective Waterproofing Products
Water is the number one enemy of a retaining wall. When water seeps into or builds up behind a wall, it adds immense weight and pressure, which can easily lead to failure. That’s why a proper waterproofing system is non-negotiable. This usually involves applying a waterproof membrane or coating to the back of the wall—the side that faces the soil. This barrier prevents moisture from penetrating the concrete or blocks, which protects them from degrading over time, especially in climates with freeze-thaw cycles. Protecting the structural material from water saturation is a key step in ensuring the wall’s longevity and preventing long-term damage.
High-Performance Drainage Materials
Alongside waterproofing, an effective drainage system is your wall’s best defense against water pressure. Simply blocking water isn’t enough; you have to give it somewhere to go. A high-performance drainage system typically includes a layer of clean gravel or crushed stone behind the wall, a perforated drain pipe at the base to carry water away, and weep holes to allow moisture to escape. It’s also crucial to use a geotextile fabric to separate the gravel from the surrounding soil. This special liner keeps dirt and silt from clogging your drainage system, ensuring it continues to work effectively for years. Proper drainage is a core principle of all hillside stabilization and retaining wall construction.
Related Articles
- Tilted Retaining Walls: Early Warnings Before Catastrophe Strikes
- Hillside Stabilization – Professional Foundation Repair
- Hillside Stabilization – Professional Foundation Repair
- Hillside Stabilization Services | Bristol FX
Frequently Asked Questions
How can I tell if a crack in my retaining wall is a serious problem? The direction and size of the crack are your best clues. Small, vertical hairline cracks might just be from the material settling, and you can often patch these yourself. However, horizontal cracks or “stair-step” cracks that follow the mortar lines in a block wall are much more serious. These indicate that the wall is under immense pressure and is starting to bow or fail. If a crack is getting wider over time, it’s a clear sign of a structural problem that needs a professional assessment.
My retaining wall is leaning slightly. Is this an immediate emergency? A leaning wall isn’t something to ignore, but it doesn’t necessarily mean it will collapse tomorrow. Think of it as a clear warning sign that the pressure behind the wall is greater than it can handle. The lean will almost certainly get worse over time, especially after heavy rain or freeze-thaw cycles. The best course of action is to call for a professional evaluation sooner rather than later. Addressing it now can prevent a much more dangerous and expensive collapse in the future.
If I fix the visible damage, like a crack or a shifted block, is the problem solved? Not usually. Fixing a crack or replacing a block is like putting a bandage on the symptom without treating the cause. Most retaining wall failures are due to immense pressure from water-logged soil behind the wall. If you don’t solve that underlying drainage problem, the wall will continue to bow, crack, and shift. A true repair addresses both the visible damage and the water management system to ensure the problem doesn’t come right back.
What’s the biggest mistake people make when trying to repair their own retaining wall? The most common mistake is underestimating the sheer weight and pressure the wall is holding back. People often focus only on the cosmetic fix—patching a crack or straightening a block—without addressing the root cause, which is almost always poor drainage. Another critical error is failing to call 811 to have underground utility lines marked before any digging. Hitting a gas or electrical line is incredibly dangerous and turns a simple project into a major disaster.
What is the single most important thing I can do to prevent my retaining wall from failing? Manage the water around it. Water is the number one enemy of retaining walls because saturated soil is incredibly heavy and exerts enormous pressure. The most effective thing you can do is ensure your drainage system is working properly. This means keeping the weep holes at the base of the wall clear of debris and making sure your yard is graded so that rainwater and runoff flow away from the wall, not toward it.